Resin Wargaming Scenery and Terrain: Ancient Ruins
Created by Worldsmith Industries
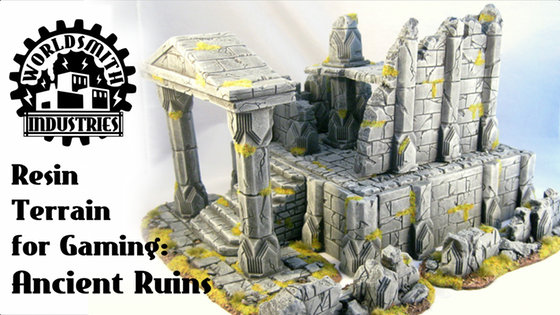
Detailed resin scenery & terrain for use in miniature wargames & RPGs, themed after the stone ruins of an ancient civilization.
Latest Updates from Our Project:
The resin is here, BackerKit will be coming shortly
over 9 years ago
– Sun, Oct 23, 2016 at 10:39:17 PM
Hi all -
The Resin has Arrived
I made it down to Seattle yesterday and picked up 50 gallons of resin, 5 gallons of silicone, a case of mold release, and a variety of other supplies. That should be more than enough to cover the Kickstarter rewards and to produce plenty of additional stock for the web-store. I've finished a fair number of additional casts, and am preparing the molds for pouring once I know the final numbers I'll need of each piece. In the meantime, I'll be using the master molds to pour some of the "Compete Set" pledge levels, as I know what will be involved in those.
Backerkit
Backerkit is taking a bit longer to approve things this time around then last time. They were one of the companies that got hit by the big DOS attack a few days ago, so I imagine they have a backlog of service complaints built up. I'm done with setting things up on my end, and am just waiting for the final approval.
When Backerkit goes live, you'll receive an email from them with a link to your account. You can then log in, select your rewards, add funds and add-ons if desired, and provide your shipping address.
If you are one of the $40 "Custom Terrain Order" pledge level backers, you'll receive $40 in credit (plus any additional funds you pledged) to be "spent" on add-ons. If you are a $300 "Complete Set" backer, there's no need to specify your reward (as it's one of everything); however, any funds pledged in addition to the base level will be available for add-ons. In either case, you're welcome to switch between pledge levels if you desire, and you can always add additional funds through Backerkit if you like.
The shipping rates are set - I'm using a $10 flat rate for any pledges priced up to $150, and a $20 flat rate for any pledges $151 and over. The actual shipping costs are likely to be higher than that on my end, but it seems the cleanest way to do things. In the case of most pledges, shipping will be automated through Backerkit. In the case of "Custom Terrain Order" level pledges in access of $150, there is a "$10 additional shipping" add-on that will need to be added to your pledge in order to cover the additional cost. No matter how much terrain is ordered, no one will be charged more than $20 for shipping.
If you'd rather not use Backerkit, please send me a message through Kickstarter with your terrain selections and mailing address. I'll be happy to work out the details with you personally. Likewise, if you'd like to do local pickup (I'm in Bellingham, WA - north of Seattle and south of Vancouver, BC), please contact me and we'll make arrangements.
Thanks again for your support and your patience. I'm eager to get things rolling so I can begin to work in earnest. Please don't hesitate to send me a message if you have any questions!
- Jim
Quick Update!
over 9 years ago
– Thu, Oct 13, 2016 at 10:13:06 PM
Hi all -
I just wanted to drop you a quick note to let you know how things are progressing. Kickstarter transferred the funds over to my account earlier today, so everything is clear from their end. I have 50 gallons of resin and 5 gallons of silicone ordered and inbound. It should arrive in time for me to pick it up in Seattle on October 22nd. In the meantime, I'm casting some more masters and getting some new molds ready to pour. I won't know until I've gotten all of the input from the pledge manager precisely how many molds of each piece I'll need, so for now I'm just casting equally across the pieces. Any masters that aren't needed to make molds will just become casts to fulfill the orders. The Pledge Manager hasn't gone live yet - I'm still tweaking things, but it should be set to go shortly.
More news to come!
Jim
And now the work begins!
over 9 years ago
– Thu, Sep 22, 2016 at 05:44:47 PM
Thanks you so much for your support during this project! In recognition of my gratitude, I have a celebratory Scotch (Glenmorangie Quinta Ruban) on the desk and a purring kitten on the on my lap. Wish you were here!
Now: Your funding source has likely been charged by Kickstarter by the time you read this. I think you'll have the next two weeks or so to sort out any funding issues or the like.
In 2 Weeks: After two weeks, Kickstarter will release the funds to me. Shortly thereafter I should have the pledge manager open through Backerkit. You'll be able to make your selections, add funds if necessary, and set your shipping address.
I have a pretty good idea of the materials I'll need to finish the orders (given the way I price my pieces and the funding level of this Kickstarter). As such, I'm going to call my best guess: 5 gallons of silicone and 50 gallons of resin. I'll place that order over the next week or so, and can always get more at short notice if need be.
In 6 weeks: I'll likely try and wrap up the pledge manager after it's been open about a month. You'll still be able to change your shipping address after that, but that will let me finalize my casting plan. I'll keep you informed with regular updates, including the number of pieces cast and the number of pieces remaining.
Once everything is ready to ship, I'll warn you, lock down the address portion of the pledge manager, and start packing.
If you have any questions along the way, please don't hesitate to ask! I really appreciate your support, and I'm excited to get to work molding and casting for you!
Warmly,
Jim
Extras, Steve Rogers, and the Path Forward
over 9 years ago
– Sat, Sep 17, 2016 at 02:34:22 PM
Due to requests, I've added a couple of extras to the main page.
For those of you wanting more monuments in the desolate ruins of your ancient civilization, I've added a pack of 5 of the extra Statue Plinths from the Ancient Temple kit. These are perfect for "The Living Museum" scenario in Frostgrave. Add them to the one you get with the Ancient Temple, outline the ruins of an old museum with some of the low ruins, and you have the perfect setting for your intrepid treasure hunters.
I've also had a couple people ask about getting some more stairs, so that they can have entrances to all sides of their Ancient Temples. As such, I've added an option for an additional 3 staircases. These could be combined with the Ancient Temple to make for an exciting "King of the Hill" scenario, with everyone fighting for control of the top of the temple.
We're in the final stretch of the the campaign, and I couldn't be happier with how things have gone! I appreciate folks' enthusiasm and kind comments. Given the size of the Kickstarter, I have no concerns whatsoever about fulfilling on time, and hope to continue my reputation of always fulfilling Kickstarters early. Please feel free to spread the words to others who might be interested, and rest assured that we're on track for a timely delivery!
Once the Kickstarter closes, your payment methods will be billed. After about 2 weeks, the funds should be cleared. Shortly thereafter (within another week or two), I hope to have the pledge manager open and ready to go. I'll be using Backerkit again, as I think they make for the most seamless service. You'll be able to log on, select the items you want for your pledge, and even add additional funds if you like. At that time, non-backers will also be able to make pre-orders. Once I have folks' responses on the pledge manager, I'll be able to determine how many molds of each piece I'll need, and order my silicone and resin. After that, I'll be busy molding and casting. I'll post bi-weekly updates, including totals of how many casts have been completed. You'll be able to change your shipping address up until a week or two before everything gets sent out.
Oh! Almost forgot Steve Rogers. In case you were looking for other creative uses of your new terrain, how about Flames of War? Sure it's 15mm, but what better system for America's favorite Captain to lead his Howling Commandos through the Cyclopean ruins at the heart of Antarctica in search of the Red Skull's secret base?
The Ancient Ruins terrain can make wonderful scenery for 15mm pulp adventures.
How the terrain was made
over 9 years ago
– Mon, Sep 12, 2016 at 04:26:27 PM
Hi folks! Thanks, as always, for your continued support!
I’ll be shooting a couple of painting videos over the next week or so, but since several folks have asked me in messages about my process, I thought I’d share some of it here.
For most of my terrain in the past, I’ve worked with “traditional” hobby materials: pink insulation foam, MDF, balsa wood, sand and model railroad ballast of varying grits, and the like. I still use a lot of those materials and processes, but have also added some 3d printing.
The last Kickstarter gave me the opportunity to pick up a small, desktop 3d printer called the M3D. Actually, the creators of the M3D have another Kickstarter going right now for a larger version of the same printer: https://www.kickstarter.com/projects/m3d/m3d-pro-feature-packed-3d-printer-for-improved-rel .
It's turned out to be incredibly easy to use, and is a great little PLA extrusion printer.
I set about designing a series of pieces that would form the basis for the ruins - a column and a couple varieties of wall sections that would allow me to create walls of varying heights and configurations.
This is the digital drawing of part of one of the wall sections. The tounge at the top is there to allow it to connect with a second story. There are no details in the digital files, just the basic shapes.
These basic building blocks were then printed. There is a fair bit of trial-and-error involved in 3d printing, but the end results are worth it.
An early version (with a thinner top) of one of the columns being printed.
While the resolution of my printer is fairly good, the finished pieces still have some visible ridges where the separate layers of plastic were laid down. To correct this, I spent a fair bit of time finishing each of the prints. I sprayed the pieces with several coats of a sandable primer, and then sanded and filed the surfaces until they were nice and smooth.
A column in the process of being sanded. You can see that the primer gets left in the recesses between the layers, but is sanded away from the high points to create a smooth surface.
Next, I make a silicone mold of the finished 3d print, and cast a slew of them in plaster. I just use regular Plaster of Paris, bought in large bags from the hardware store. While harder plasters and dental stone are usually better for terrain making, the softer plaster is perfect for carving, and only has to survive the final mold-making process.
Test fitting some of the 3d-printed wall pieces before they are finished. The middle wall section is made up of 4 prints: 2 corner pieces (upper and lower stories) and 2 straight pieces (again, upper and lower).
Once I've cast a fair bit of the plaster pieces, I design the final terrain pieces. There's a lot of sanding (please wear a dust mask if you're sanding plaster!) and gluing to get everything to fit snugly. I then carve in the details with a metal scribe, some dental picks, and an X-Acto knife. I've also found, particularly when creating ruins, that a ball peen hammer is a surprisingly useful tool. Many of the tops of the ruined walls were created by breaking off chips of the plaster with a hammer. The broken plaster has a very stone-like texture, and the leftover broken pieces can be recycled as rubble.
From left to right: A finished 3d print, a plaster cast of the 3d print, a carved plaster cast, and a final resin cast
These carved plaster models are then combined with traditional terrain-making techniques. For example, in the case of the scatter terrain, the broken plaster ruins were glued to an MDF base and finished with a variety of sand, rocks, and pieces of broken plaster.
The base of the Flooded Ruins under construction. It consists of an MDF base, some foamcore for elevation around the sunken areas, and lots of plaster cobblestones.
Once the pieces are complete, they are serve as the master models for the final silicone mold. They get a coating of gloss sealant, a spray of mold release, and then molded. If you are interested, I provided more info on how to mold terrain in one of the updates in my previous Kickstarter.
The base of the Flooded Ruins, ready to be molded.
These molds can then be used to cast resin copies. Resin has the advantage of capturing the detail of the original model, but being much, much more durable that the original piece.
Test fitting 3d-printed columns in a cast resin Flooded Ruins base.
In a nutshell, that's the basic process I used for the terrain pieces in the Kickstarter. If you are hobby-minded, I hope this is useful to you! One of the things I like so much about this hobby is all of the random skills you end up acquiring. If you have any questions about any of the techniques I've used, please don't hesitate to ask!